Our Top 10 Must Have Travel Accessories

Here it is — our favorite accessories for travelling around the world with kids

  1. City Mini GT Stroller – we bought a used one since we’d be schlepping it around and checking it on airlines. I also didn’t want to bring a new one in case it got stolen or damaged. We love the big wheels (great for “off-roading”), big sunshades and how easy it is to fold up.
  2. Phil & Ted’s Lobster Chairs – a must for feeding. We use them in our apartment when travelling as well as at restaurants.
  3. iPlay sun hats
  4. Neat Solutions Table Toppers – we use them at every meal
  5. Babyganics hand,f ace and baby wipes – use them for everything!
  6. Baby Carriers – Ergo360, Beco, Solly Wrap and Ringsling
  7. Munchkin Miracle 360 Sippy Cup
  8. Aden & Anais Swaddle Blanket
  9. Luv2Nosh Crackers
  10. Baby Bjourn Travel Cribs

Flying on JAL with infants

Here’s our honest review of flying on Japan Airlines (JAL) with infants

Reservations:

  • They were extremely helpful. Besides having to wait on hold for upwards of 10-15 minutes, they fulfilled all of our requests (bulk head, bassinets, kids meals).
  • They charge 10% of the fair for each lap infant. Includes a checked bag and a kids meal.

Pre-Flight:

  • They were very nice at check in.
  • We checked our stroller at the gate about 30 minutes prior to boarding. They provided a plastic bag for it.

Flight Pro’s:

  • Airline is very clean and modern. We flew on the Dreamliner. Seats seemed spacious for coach.
  • Flight attendants were very pleasant. They set up the bassinets shortly after takeoff. Provided pillows and blankets.
  • They come around with a kids toy from the airline –  nice touch!

Flight Cons:

  • Kids meals were a bit unusual. Came with a banana and muffin at the beginning of the flight. The meal was some sort of chicken salad (I think). Didn’t seem too appetizing.
  • You must change your infant in the lavatory. We learned the hard way! The changing table goes over the toilet and is actually clean and okay. (Ok this isn’t really a con, but so much easier to change your baby on your lap!).
  • Flight attendants were VERY awkward with the babies making noise during “quiet” time. They turn the lights off about 2 hours after takeoff (even though it was only 3pm Boston time). It’s hard to get a young kid to go to sleep at that time. Every time my kids made a peep, they stood over us. What are we supposed to do?!? They also asked, numerous times, that we get up and go to the lavatory area, as to not disturb other passengers.  I should add that the flight attendants on the Tokyo-HCM flight were much better with the babies.
  • It’s hard to eat with a baby on your lap. Flight attendants weren’t good about bringing us food after service. Also didn’t clear quick enough – this is very challenging with a lap infant.
  • Food at the Narita airport was scarce. I was excited for Japanese food but unfortunately, didn’t get any!

All things considered, the Boston to Tokyo flight is fantastic. Non stop on a beautiful, clean airline. I wish the flight attendance were a bit more kid friendly and attentive, but overall, it was a positive experience. We will definitely fly with them again.

Flying Across The World With Infants

Let’s be honest, the thought of flying across the world with not one, but two one-year olds, sounds like hell!  We did it — and we lived to tell about it.  Here are some tips that we learned:

In preparation for the flight:

  • Kids under 2 can be lap infants. However, when flying international, you need to actually book a lap infant ticket. It typically costs 10% of the fare and includes meals (ask for kids food), as well as a checked bag and a stroller (depends on the airline).
  • If your kid is under 23 pounds, request the bulkhead seats with a bassinet.  All airlines have different rules and procedures, so make sure to look it up and all multiple times to confirm.  If you don’t get a bulkhead, make sure you have an aisle so that you can easily get up and down with your baby. NOTE: if you get a bulkhead and don’t plan on using bassinets, the arm rests don’t rise, so if you want to lay your kid across the seats, that won’t work.
  • Make sure that you have enough toys, foods/snacks, but don’t have too much.  Too much “crap” will weigh you down, literally.

What to pack in the carry-on-bag:

  • Food: puffs, nosh’s, late July peanut butter crackers, applesauce, pouches, water cups, bread, rice cakes.
  • Clothing: PJ’s, t-shirt, new outfit, swaddle blanket (for sleeping), blanket
  • Accessories: Monkey Mat, hand wipes, face wipes, anti bacterial wipes, carriers (Ergo 360 and Beco), Solly wrap (my favorite), airplane pillow (for mama).
  • NOTE: we decided not to bring car seats on our 3 month trip. If you bring car seats, inquire with the airline whether there is room on the flight and if you can bring your seats on board. You’ll have to ask at the airport, since they won’t give you approval ahead of time if you haven’t booked an extra seat.

Pre-Boarding (day of):

  • We prefer to bring our stroller and carriers to the gate. This way, we can wheel them around until the flight is ready to board. We also brought our carriers (Ergo 360 and Becco), so we could be wearing them as we boarded. This made for an easier transition to our seat.
  • Don’t forget to bring the babies passports as well as a copy of their birth certificate (just in case).
  • After security, we let our kids crawl around to release some energy. Yes the floor may be dirty, but it’s better than cranky kids. Some airports have an area for kids.
  • Change diapers before boarding and buy a large bottle of water for the flight — not only is it important to keep kids hydrated, but also mom and dad.
  • If you’re nursing, I’d suggest waiting to feed them during takeoff. Also, make sure they’re not starving, but also feed them on board, as this will take up some time.  If you’re pumping, many airports have nursing/pumping rooms. Google before you go.

On the flight:

  • Bring anti-bacterial wipes and clean the entire area near your seat, armrest, buttons, tray table. I also suggest putting a mat of the tray table (we don’t go anywhere without or Neat Solutions disposable placemats).
  • Nurse, bottle feed, water feed or just feed during takeoff. This will help their ears.
  • If you’ve requested a bassinet, they won’t set it up till after takeoff. Usually they are clean and provide some sheets/pillows, but I suggest bringing your own blanket as well.
  • Toys, distractions, whatever you can do! We brought a handful of toys that the babies could play with. We also utilized magazines (to rip up), tissues (to tear up), books, iPhones, you name it.
  • Many times during the flight, we utilized the space near the bathrooms to play with the babies. Keeping them confined and quiet in one small space is not easy.

Lessons we learned:

  • Book a night flight – we flew during the day (and the night) and it was hard to get the babies to go to sleep at 3pm.
  • Bring an extra person with you! We had our nanny and we don’t think we could’ve done it without her.
  • Utilize help around you
  • Pre-board
  • Pay for a porter before check in
  • Don’t bring too much stuff!

Jet Lag is No Joke

Taking our 1 year old twins on a 27 hour flight across the world was tough enough, dealing with jetlag was a whole different game.  Vietnam has a 12 hour time difference from Boston, so adjusting for the kids was quite difficult. Plus, they were teething and sick, which made matters worse.  It took a good week before the girls were sleeping regularly and eating. They literally didn’t eat for the first week, which was concerning, but we made sure to keep them hydrated.

Here are some tips that we learned:

  • Let the kids nap/sleep as much as they want for the first 2 days. That said, if you want them to sleep through the night (or as close to that as possible), make sure they don’t nap past 5 or 6PM. Wake them up – they will be grouchy but it’s for your own good.
  • During the night, I allowed myself to get up one time and nurse them (usually they sleep through). Beyond that, I let them cry and settle in their crib.
  • Make sure to keep them hydrated. They likely won’t eat like normal.  Get them foods and drinks that give them nutrients, such as smoothies, yogurt, eggs, fruit, ice cream, avocado and lot’s of water.
  • Make sure their room is dark – use a black garbage bag over the window if the shades aren’t good enough.
  • Most importantly, be patient.  Kids are smart, they’ll figure it out.

Cheers!

Pampering Time (not talking about diapers)

Life with twins is a constant marathon, so taking some “me time” is a must. On my birthday, my parents treated me to a day at an incredible spa in Ho Chi Minh City, Vietnam. I spent almost 4 hours at Villa Aesthetica in District 2. I have to say, if you are ever in the area, this spa is amazing.

1.jpg

I started with a 60 minute “Best of Asia” massage. From the moment I entered the spa, the service was impeccable and the decor was beautiful. The massage was excellent — extremely relaxing, just what this mama needed.

Following the 60 minute massage, I was led outside to this gorgeous pool. And was handed a glass of Prosecco for my birthday — my favorite!

2.jpg

Next came a traditional Hammam Treatment – I went with the “Gold Mask Hammam”… OH. MY . GOD.  It started with a steam in this steam room…

3

Then I was led into the most exquisite room I’ve ever seen and laid on a slab of marble, where I was washed, from head to toe, for 90 minutes.

4

It started with a deep cleansing exfoliation, then came the foam massage/bubble bath (but you aren’t in a tub), followed by a wrap, a gold facial mask and then a hair shampoo/conditioner/scalp massage. It’s a bit hard to describe without actually doing it, but I can’t recommend it enough. I left feeling refreshed, relaxed and clean!


Travelling across the world with twins

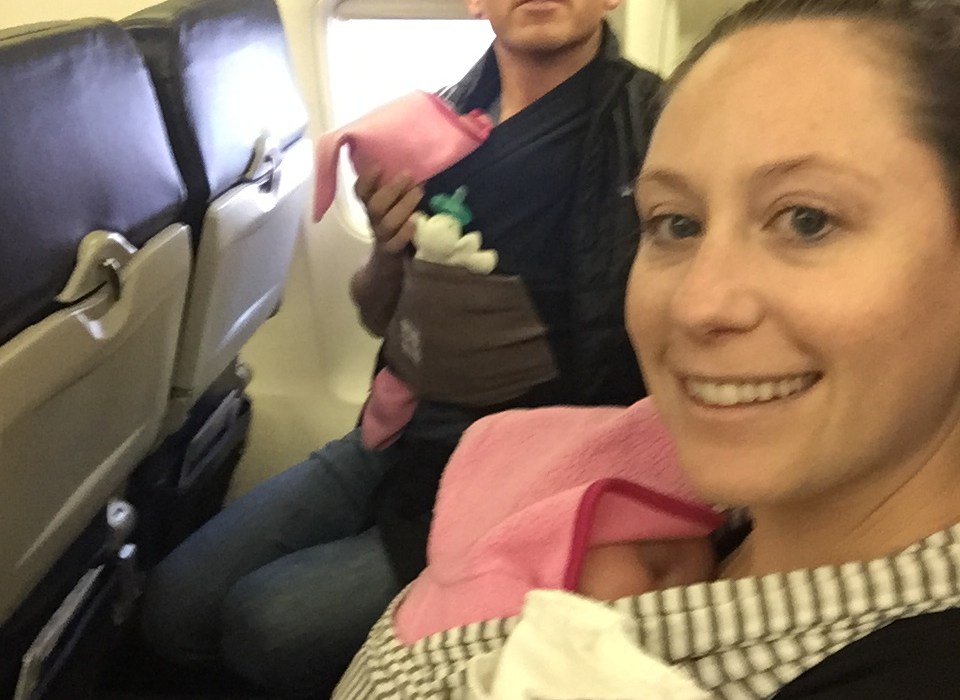
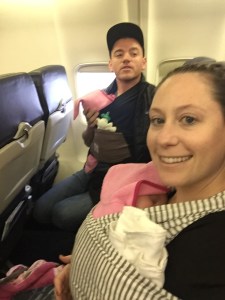
We did it!  We took a 27 hour flight and flew to Vietnam for 3 months with our just-turned-one-year-old twins.  How did we do it? How did we pack? What did we bring?  Let me start by saying, it was not easy. But, it sure was an adventure.
Let’s start with our trip prep -Immunizations, Packing, and Planning:

Immunizations: about 6 weeks before we left, we contacted our pediatrician who recommended that we visit a travel clinic.  We went to the travel clinic at Children’s Hospital. Since the girls had not yet turned one, the only vaccination that they could get  for Vietnam was Japanese Encephalitis (outside of the ones they get for their 1 year such as Hep A and flu shot). This was a two part vaccination, so we had to do a follow up one month later. We also got a prescription for Malaria pills.  The travel clinic made us a bit nervous with all of the potential diseases that the babies could contract in Southeast Asia. And, if they didn’t get a disease, they could get bitten by a ravenous dog, or get into an auto accident… hmm.

Packing: Since we have quite a bit of experience travelling, I know that having less is better.  Too much stuff can weigh you down.  But, I’ve also never traveled to a third world country with babies, so I wanted to be sure we had the right stuff, that we couldn’t get in Vietnam. Here’s the essentials that we packed (don’t forget this is for twins):

  • 250 diapers (this will last us approx 1 month)
  • 8 packages of wipes
  • Swim diapers
  • Sun hats
  • 2 sets of bathing suits
  • 2 sets of rompers
  • 8 long sleeve shirts
  • 8 t-shirts
  • 2 sweat shirts
  • 4 pairs of leggings/jeans
  • 2 jackets
  • 2 raincoats
  • 4 PJ’s
  • 2 pairs of sneakers, 2 pairs of shoes, 2 pairs of moccasins
  • Socks
  • 2 Swaddles
  • 2 Sleepsacks
  • 2 Blankets
  • 2 Crib Sheets
  • 2 Baby Bjourn Travel Cribs
  • 2 Lobster Chairs (to be used as high chairs)
  • 6 sippy cups
  • 2 cups/plates
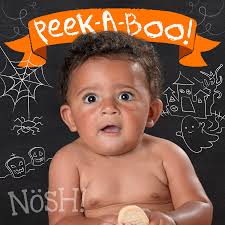
  • A whole bunch of pouches, Nosh’s, puffs and peanut butter crackers
  • 1 City Mini GT Double Stroller
  • 1 Diaper Bag
  • 2 Ergo Carriers, 1 Solly wrap, 1 ring sling
  • One small bag of toys, 4 books
  • Sunscreen, bug spray
  • All the meds – tylenol, advil, cough medicine, benedryl, diaper rash cream, etc.

Here’s what it looked like unpacked:


Planning:

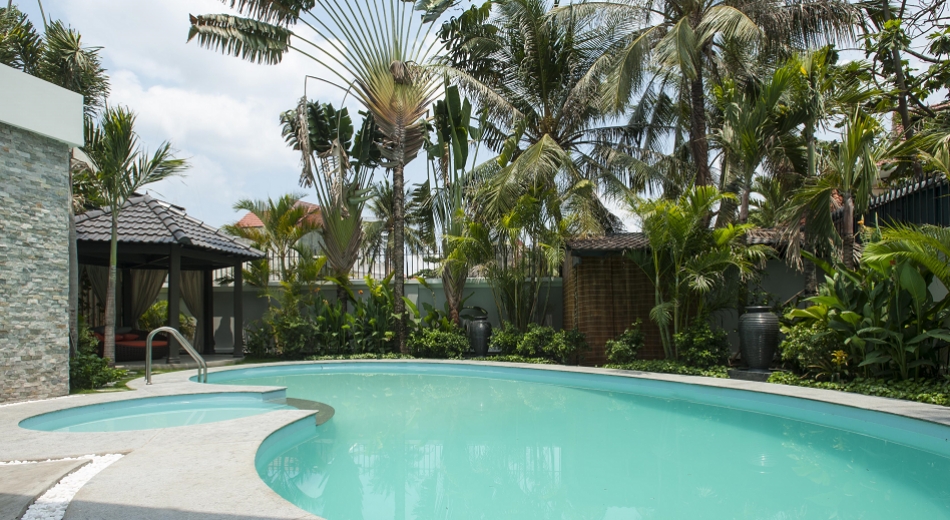
Prior to our trip, I joined the local expat facebook group. Here, I met other expats and figured out where we should live.  We picked a Full-Service Apartment Complex in D2, called Riverside. It was actually quite expensive ($3,000 US for a two-bedroom, per month). We chose this because it is perfect for families with young children, has many activities (kids activities, yoga, swimming, tennis, restaurant), etc. and most of all, is safe. It’s outside of the hustle and bustle of busy Saigon, and is filled with Western families – US, Israeli, European and Japanese (more or less).  Through this facebook group I also found a good medical practice very close to our apartment, in case of emergency.

Speaking of medical practices, we purchased medical insurance through travelinsurancecenter.com. We went with the Patriot International plan, which cost our family around $500 for 3 months and includes all out of pocket medical expenses (minus a $100 deductible). It also has emergency medical evacuation coverage up to $500,000.

With an apartment booked, emergency medical information and medical insurance, we felt pretty good and prepared for our trip!

We can’t wait to share our adventures with 1 year old twins in Vietnam… stay tuned!


How to Transition from a Rock n’ Play to the Crib

Does your baby sleep in a Rock n’ Play (RnP)? Most do even if they won’t admit it.  The RnP was our savior; the twins were spitting up every time we put them down and once they found their RnP they slept for hours!  However, after 4 months, we decided it was time to transition them to the crib. Easier said than done!

The first night in the crib was awful – they were up every 2 hours. So, we did some research and found a solution that really worked:

  1. Pick up the mattress and put two large books on the long side of the crib. Put the mattress over it so that it is at a slight angle.
  2. Roll a beach towel and put it over the mattress in a “U” / horseshoe shape. You want the “U” to be upside down.
  3. Put a sheet over the towel
  4. Take a pillow, rolled swaddle or towel and put it on the bottom of the crib, so that if the baby slides down, their feet will stop them from hitting the crib (so to feel more “enclosed”
  5. Put the baby on top of the sheet and move the contraption so the baby feels secure in it.
  6. Swaddle the baby
  7. Pray that the baby sleeps! 🙂

Taking your twins on an airplane

Whether you have an upcoming trip or you’re thinking about (or dreading) booking a trip, here is what you should know about flying with twins (and some tips and tricks).

IMG_1765

What you need to know:

  • You can only have 1 lap infant per passenger (a lap infant is from 0-2 years old).
  • You can’t have 2 lap infants in the same row unless there are three seats and only 2 passengers; there needs to be an oxygen mask for each passenger/lap infant. If you are in a row with three seats there are 4 oxygen masks. This means that you can’t sit next to your companion if there are 3 actual passengers in the row. Some airlines make you skip a row, so you’ll likely be sitting by yourself with only one of your babies.  If you want to sit with your companion and both babies, consider booking an extra seat
  • Checking a car seat and stroller are free – we purchased car seat bags on Amazon ($14) and check our stroller and car seats at check in, so we don’t have to drag them through the airport, but you can also check gate side if that’s easier for you. Make sure to put your car seat in a car seat bag to protect it from germs, etc.
  • A diaper bag does not count as a carry on
  • You can bring breast milk and a pump on the plane. Put the breast milk in containers less than 3.5 ounces so they don’t need to be scanned. If you put it in a bigger container, they just need to be scanned.
  • You carry your baby through the metal detector. They will scan your hands after you walk through.

Tips:

  • I prefer to check the stroller and car seats at Check-in and wear the babies in a wrap/carrier.  This way, you don’t need to take them out of the car seats at security
  • Pack two diaper bags in case you can’t sit next to your companion – this way you will each have diapers, wipes, change of clothes, etc.
  • Pay for a porter when you get to the airport – don’t waste energy or get stressed by having to carry all of your checked bags to check in.  Have $5-$10 ready and have someone help you!
  • Pack extra “stuff” in the stroller or car seat bags. I stuff them with stuff, such as shoes (mine), diapers, breast feeding pillow, etc.  They don’t weigh them or look through them.
  • Nurse the baby(babies) during take off and landing. Have a bottle or pacifier for the other baby if you can only nurse them one at a time (tandem feeding is very hard on a plane, but if you can do it, good for you!).
  • Wipe down the whole area right when you get on the plane – including the tray table, arm rests and seat belt buckles.
  • Pack an extra change of clothes and diapers for the plane!
  • I get grossed out changing the babies in the bathroom (which is what you are supposed to do). I usually change them on my lap, but you may get dirty looks from people.
  • DON’T BE AFRAID TO ASK FOR HELP – whether it’s at the gate or on the plane. People will be happy to help.
  • If there’s a long line at security, tell them you have twins and sometimes they will expedite you through.
  • Pre-board with family boarding – trust me, you will need extra time!

The 6 Products I can’t Live Without #Twins

Here are the six products we absolutely can’t live without for our newborn twins:

Rock n’ Play

Before the twins arrived, I spent cIMG_1102ountless hours setting up and decorating the nursery.  I loved the look of my cribs and couldn’t wait for the babies to sleep in them.  I also purchased the Arms Reach Co-Sleeper so we could have the babies in our bedroom.  However, after a few weeks of spitting up every time they laid flat, we purchased the Rock n’ Play and boy was this the best decision we could’ve made.  The twins have been sleeping in them for the past 8 weeks.  We move them from the nursery to the bedroom and we even brought them to Aruba.  They are by far the best things for our babies to sleep in and I highly recommend them!


Table for TwoIMG_0280

A fellow twin mama told me about this one. My girls sit in the table for two most of the day.  It’s also great for bottle feeding them at the same time with only one person.  The patterns are super cute and although the price tag is a bit steep, it’s well worth it!


Snap n Go Double:

IMG_0108This is the #1 stroller for twin mamas. It’s inexpensive, light, easy to take in and out of the car and practical. It fits most car seats (just double check to make sure it works with yours).  Be aware that some of the older models don’t fit all of the car seats.  The stroller positions the twins front to back (as opposed to side-to-side). I bought a fancy stroller (the Bugaboo Donkey, which is side-to-side), which I haven’t used yet.  The only criticism of the Snap n Go is that the wheels aren’t made for navigating sand or snow. But, it’s perfect for almost everything else!

Chicco Keyfit 30 Car Seats:

These car seats are great! Plus, almost every other mom (both singleton and doubles) have these seats. They are priced mid range ($199), are light weight and safe. The bases are super easy to install and the seats just click in and out.  In addition, you can use the seat without the base, say for example you are on vacation. They come in a variety of colors.

My Brest Friend Deluxe:

This is a must have for any nursing mother of multiples (and the single version for mothers of singletons). I’ve tried many other nursing pillows, including the Twin Z (more on this later) and this is the easiest to use. What I like about it is that it is easy to set up and position the babies. It can be used in bed, on a couch or on the ground. The only thing is that it is sometimes tricky in chairs, as there’s sometimes not enough space. No need for pillows underneath or beside, it works well on it’s own.  The problem with the Twin Z is that my babies were too small and I would need props to properly position the babies. It’s also big and cumbersome and it just didn’t work for us. Perhaps if you have larger breasts it may work better.


Boon Soak 3-Stage Bath Tub:

Let’s talk bath timeIMG_1223 (1)– the first two weeks we were nervous to bath our twins so we would do sponge baths on their changing table. Next we tried showering them; my husband would stand in the shower and I would hand him one baby at a time. It was a bit scary as the babies would be slippery (we would use a towel which helped).  We wanted a solution where we could bathe both babies at the same time and feel more safe. Plus, they loved the warm water so we wanted them to be able to enjoy it for longer. Introducing the Boon bath… our girls love it. It feels safe, it’s easy to fill and the girls sit and play at the same time.  I highly recommend getting two so that they can bathe at the same time.

The On-The-Go Everyday Essentials… What’s in the bag

My diaper bag is always fully stocked, so I’m able to get out of the house in a mere 5 minutes with my twins.  Here’s what’s in my bag (and my car):

FullSizeRender

Bag – I spent a lot of time researching diaper bags for multiples; do I need a double sized bag or is a “regular” size good enough?  I went with the Marc By Marc Jacobs Pretty Nylon Eliz-a-Baby Diaper Bag from Bloomingdales. It comes in Quartz and Black. Black is the most popular color but I went with the Quartz. I love it – it fits everything and is big enough for twins.

Diaper Holder/Changing: I love my Skip*Hop Pronto Changing Station. I store my diapers, wipes and ointments in it. I often take it out of my diaper bag and into my stroller. When I change the babies, I grab this instead of the whole bag. And, it comes in adorable patterns.

Swaddles: I always have at least 2 swaddle blankets at all times. I use them for everything – for nursing, covering the babies when out in public, warmth, sometimes even for spitting up. I love the aden + anais swaddles.  I also love the Chick Pea faux swaddles that I bring for warmth. They don’t work well with the carseats but if you take the kids out of the carseat, they are great to have along to keep them warm.

Nursing Cover: I am obsessed with my Hold Me Close infinity nursing scarf. I use it everyday and it’s both useful and cute!

Burp Cloths: I always have at least 4 burp cloths with me at all times as my girls love to spit up.  I especially love the ones from burpies.com that someone gave us as a gift – each one is customized.

Bibs: Because my kids spit up all the time, they wear bibs.  I like the ones from Carters as they are cheap and I need a lot of them!

Extra Outfits: Always bring extra clothes as you never know when your little ones will have a “blow out”.  My favorite outfits are the kickee pants – I love the soft material and the patterns are super cute.

Mobile Pump / Bra: I love to multi-task so I often pump while driving (I set it up before I begin and use a hand-free nursing bra so I am NEVER distracted while driving).  I keep my Lansinoh SignaturePro Double Electric Breast Pump in the car and make sure to bring the pump parts along with my Medela nursing bra.  The pump runs on both electricity and batteries so it’s great to use on the go.

Bottles/Formula: While I breastfeed my babies most of the time, they do get formula/bottles when it’s convenient for me.  I always have two empty Dr. Browns Natural Flow 4oz Newborn bottles with me as well as a can of formula. I use Enfamil EnfaCare for babies born prematurely (this is what they started us on the NICU and my girls like it so we stuck with it). In addition, I always have Enfamil Ready-to-Use 2oz bottles with a nipple, just in case I’m ever in a bind.

Cleaning: I use the Mustela facial Cleansing Cloths to clean my babies faces when on-the-go as well as the dapple naturally clean Pacifier wipes. I also always have extra ziploc bags on me at all times.

Do you have similar items in your diaper bag?